Thursday, March 19, 2015

Enemy 2 attack artifact, and a little bit of projectiles

Hi again, time for the weekly update and it is about animation!

I have been working on a more animation this week, regarding the attack animation for Enemy 2 and its projectile design.

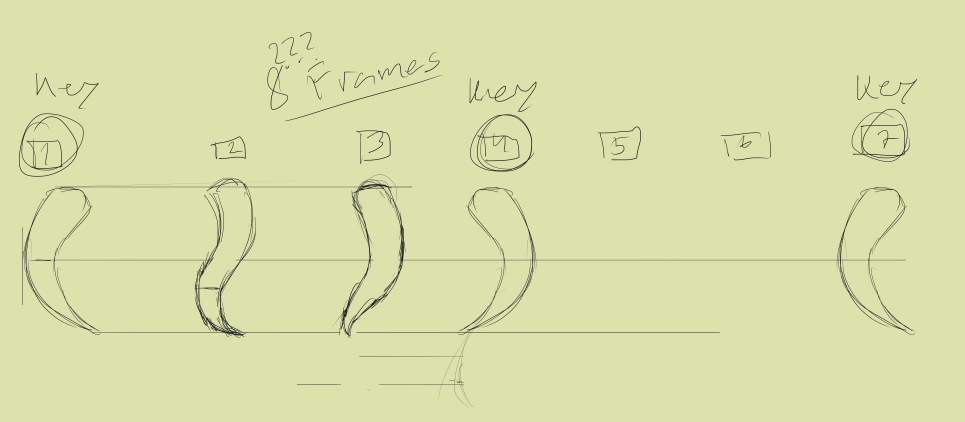
You should all be familiar with my animation workflow by now since I have been writing about animation on almost every post for the past few weeks. I will to a short summary for you who are not familiar with it. It is all based on having a solid foundation, by starting out with a good sketch, then adding on details as you progress and finalize your project.

The key is to have a strong foundation so that you do not find yourself half way through the coloring process, realizing that your key frame timing is off and you need to start over. And yes that did happen when I was starting out with animation.

If you need more information about my animation workflow take a look at the previous post I made. This includes a pretty detailed description of how I work in Photoshop, and what decisions I make.

So this is what I have to show for the Enemy 2 animation:
The ideas I had in mind was to have the enemy move similar to a spring. That was a tad too complicated to animate I quickly realized since you have to consider the foreshortening etc.

So I went with it just squashing itself, and then stretching to shoot the projectile. In my opinion it is an okay looking animation and it is serving its purpose.

I mentioned that the enemy was going to shoot a projectile, so instead of having to ask the programmers to do a bunch of work in the engine. Just so that I could see the result of the animation in work. I did myself a little mock up of how the two animations that I have made would blend together.

And it all look pretty coherent to me and we will see how we can recreate this in game. It is not impossible by any means but you never know what problems might appear.

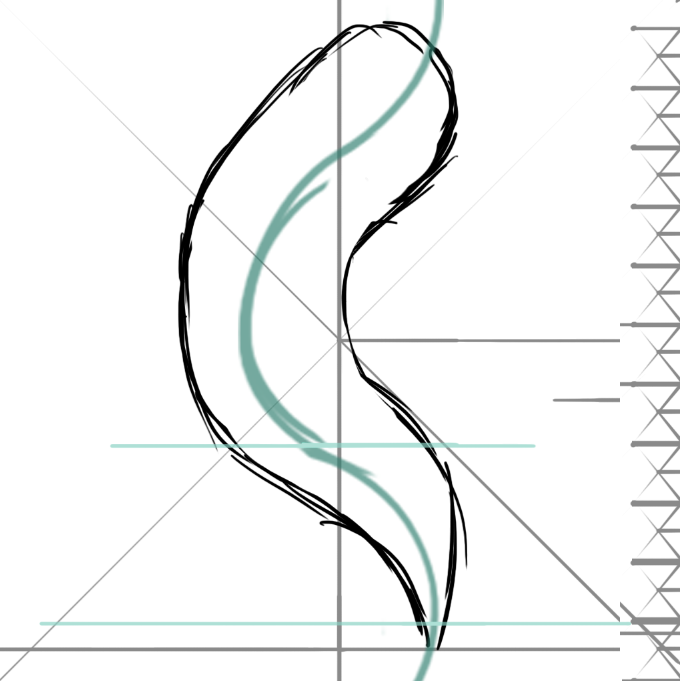
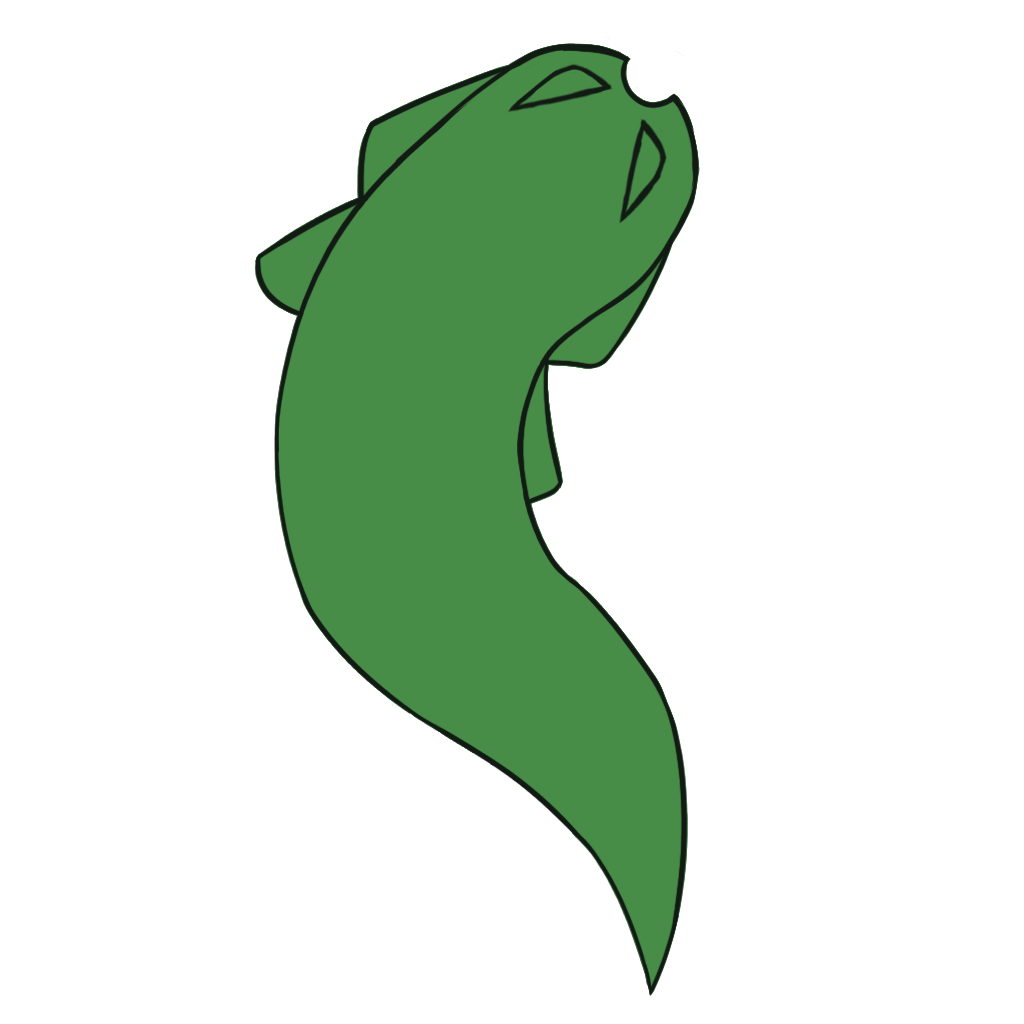
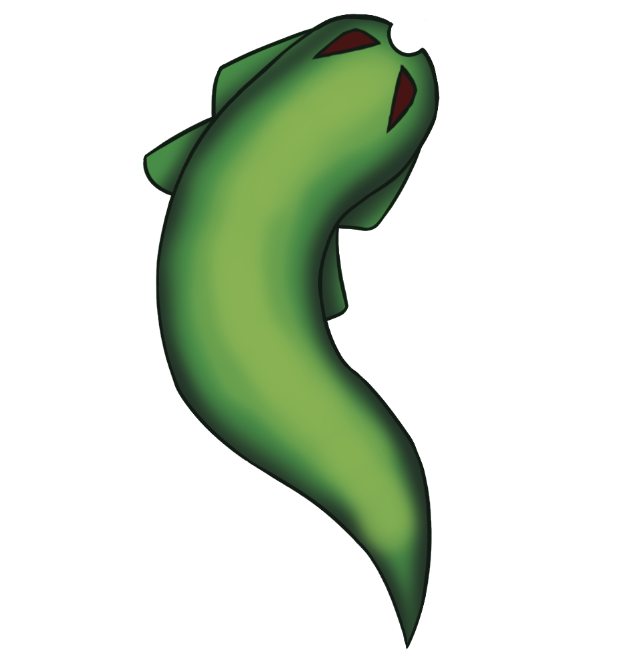
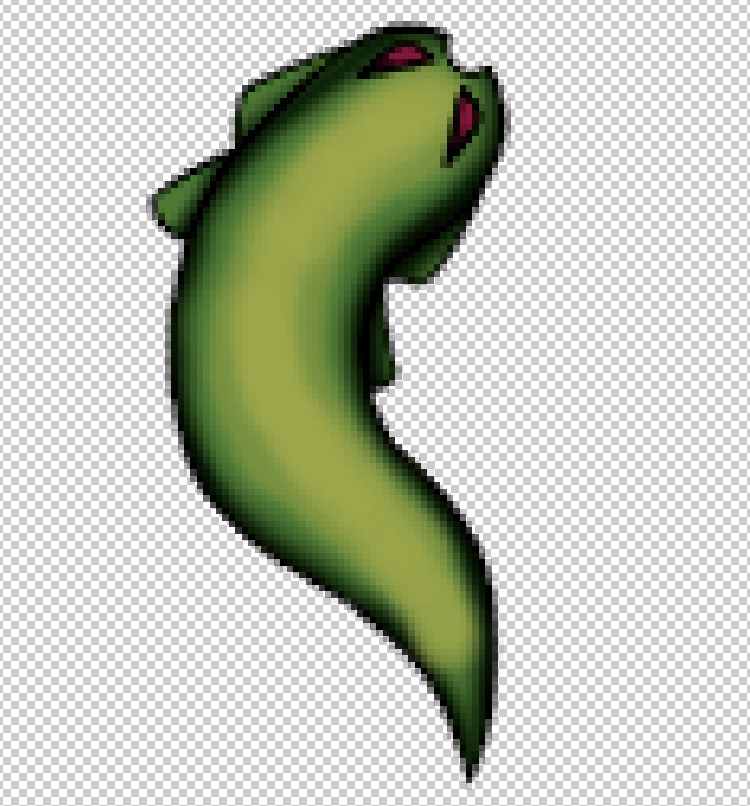
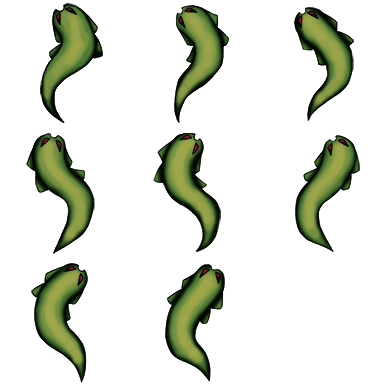
A quick look at the bullet or projectile for Enemy 2:
For the bullet, we wanted something slimey and organic. All this with a toxic green, desaturated color palette that would fit the enemy 2 color scheme. As well as contrast between the players bullets, that are very saturated and neon colored.

What I did for the mock up animation was that I squashed the projectile for a single frame to give the viewer a sort of preparation before the actual projectile starts to move off screen.

I personally think that it gives the projectile a little bit more power in it's motion, even though it is just visible for two frames.

Thursday, March 12, 2015

Artifact: Enemy 2 Animation

Blog post 12/03/15

Another week another blog post! This week I’ve been working on the second enemy (enemy 2). Re-working it’s first design so that it fits the same art direction as enemy 1, and animating it’s idle animation.

The experience I've gathered from working on enemy 1 for so long has helped me create a completely new animation for enemy 2, much faster than before. The reason for that is because I've made myself a personal workflow to follow.

I have learned how to use key frame animation more efficiently and since our game doesn't have too complex animation at the moment, I can keep the frame count relatively low. So I actually don’t have to use Photoshop's video timeline.

The way I work is by opening up a new file and making a layer specifically made for drafting out the key frames. By writing out the amount of frames I want across the canvas, I can draw a really rough sketch of my keys under the number.

blog ani drafting.png

As you can see it’s really rough and it’s pretty much me experimenting with the timing, and figuring out the animation loop.

After I have my basic idea of what I need to animate I separate the key frames into single layers,
preparing the Photoshop document for animation. Drafting out the key frames like this is a quick and easy way to have a greater overview of your animation, and a better foundation to work from.

After I’m done and have the timing and loop set I add all the frames and animate the animation with a hard round brush. It will looks sketchy at first but the hard round brush makes things easier to clean up, and helps when I’ll fill in the flat colors later.

blogg line sketch.pngBlogg flats.png

The blue lines and the grey lines are all guidelines for the timing of the animation. The blue lines are a long wave shaped line that is there to dictate how the shape of enemy 2’s body will move along it. This method of animating was something I came up with when I was struggling with enemy 1’s “wings”.

The basic idea is that you have a long wave that will be the track for the asset you’re animating to follow. Move the blue guideline down on the next frame and continue until you have your full animation done. Something that helped was to put a line that showed where the end frame was so that I could fit the spacing perfectly for the animation loop to work.

When the animation was done it was time to polish it all up visually. Filling in the flats and then going over all the frames for shading and highlighting. Adding the eyes and making sure that all the frames matched up without any noticeable difference.

blogg Shaded.pngblogg 128.png

When that’s done I re-sized enemy 2 so it fit the game, going from 1024x1024 to 128x128.
It reads good and retained all the main features. I did however notice that the colors were too saturated compared to the game, so I increased the contrast and changed the Hue/saturation to fit the game more.

Finishing it up with sprite sheet packer and sending it off to the programmers to implement it in-game.

Enemy 2 idle spritesheet.pngEnemy-2-animatedV2.gif

Thursday, March 5, 2015

Animation artifact

Time for the 3rd post about animating in Photoshop. Yes it's probably very repetative to read all this, but imagine actually being the person working on it haha. Serioulsy though I was very burned out working on this last week but something refilled my energy and I've been doing some proper work again.

So what is the work I've been doing? I've actually not been animating, well a little bit but mostly correcting small errors in the animation. For example adding the teeth and merging the line art layer for clean up, where ever the "fleshy" part of the alien would clip through.

Other than that it's been work, moving the entire previous animation I did in Photoshop CC's video layer tool over to the key frame tool. This meant sitting down for a good while cutting and pasting each individual part, and frames of the alien over to a new document using the key frame animation instead.

The reason for this, has been explained in the previous post. It's basically video layers not working too well when you want to duplicate an animation and re-use it, only mirrored and editable.

When I was finished transferring the animation over to key frame animation, I started setting up the layers so the animation could actually play. This is a very time consuming process, since every layer will be representing each frame ( work flow with key frames explained in the first artifact post ).

After all the "hard" work was over I began filling in the flats for the alien, through out the frames.
I did feel like the colors I picked from the first iteration of the alien was a tad too saturated. So I'm experimenting with the hue/saturation in order to hit the sweet spot for the color scheme.


Sorry for the flashing, but I have only finished a few frames completely. Shading an animation takes a bit of time. Speaking of shading, it's another part of the animation I've learned a lot about. The work flow I used for the very first version was to hand paint everything at a high resolution.

Each frames was a "finished" frame. This was not optimal. Because every frame I finished had way more differences compared to the neighboring frame. you could compare it to working  zoomed in on a painting for too long and not seeing the whole picture.

What I've been doing differently this time around is that I'm rendering 2 frames completely and then use those 2 frames as a reference point. After that I'll shade in one shadow at a time, and then do a playback to see if that single shadow fits into the animation.