Monday, April 20, 2015

Theme Park Banner

Just a quick update on what I've been currently working on this past week.

I've been working on the banner for our Theme Park game, called PvGvP (player vs god vs player).
The basic idea for the game is to have two players fight each other in an arena, while avoiding various traps around the arena. These traps are activated/controlled by a third player aka the god.

This player will be in control over the various traps and their job is to try to kill the other two players or at least hurt one of them as much as possible.

The reason why the "god" would want to hurt the two players as much as they can, is because the god will have to battle the winner of the two fighters. So beating the winner of the first battle will become easier the more damage the god inflicts.


FINAL


After many concepts and a lot of polish, this became the final version of the poster!

Thursday, April 2, 2015

Introduction to Zbrush


Starting this week, I'll be studying the Zbrush course!

This is my second attempt at modeling a mouth, and this time I'm more prepared since I've watched
through the majority of the videos posted on the school forums.

Instead of working directly on an unprepared box primitive, I followed our teachers video instructions
and began with the Cube3d tool.
Starting off, I focused on really nailing the creasing of the two lips by having a proper depth to it.

Working on a low res primitive for the base structure, helped define the 
main landmarks of the mouth
much faster.

I had problems moving the vertices during the early stages because my brush size was too big. The
solution was to resized the move brush to a smaller size for more accurate sculpting.

(SubDiv Lvl 1) 
When I felt satisfied with the shape of the base mesh, I moved on to add more subdivision in order to add more details.
(SubDiv Lvl 3)
Looking at the mesh with PolyFrame turned on, was when I noticed how much I had stretched the outer faces.
I'm not sure how to fix this issue besides dragging the edge vertices closer to the mouth, but that would "damage" the square shape.
(SubDiv Lvl 6)
I went up to 6 division levels, just for some experimentation with the TrimDynamic brush in order to define the edge
of the lips a bit better.
I used the anatomy references handed out during the first class, as well as my own face using the laptop web camera.

Some problems I had was how many sculpting artifacts were left around the mouth, and I should probably do a second
pass of smoothing to relax the vertices.

I was also suprised when the tutorial video said to use the box primitive that had a center vertice. But it turned out
to be very helpful since it had circular edge flow, following the main muscles of the mouth.

Thursday, March 19, 2015

Enemy 2 attack artifact, and a little bit of projectiles

Hi again, time for the weekly update and it is about animation!

I have been working on a more animation this week, regarding the attack animation for Enemy 2 and its projectile design.

You should all be familiar with my animation workflow by now since I have been writing about animation on almost every post for the past few weeks. I will to a short summary for you who are not familiar with it. It is all based on having a solid foundation, by starting out with a good sketch, then adding on details as you progress and finalize your project.

The key is to have a strong foundation so that you do not find yourself half way through the coloring process, realizing that your key frame timing is off and you need to start over. And yes that did happen when I was starting out with animation.

If you need more information about my animation workflow take a look at the previous post I made. This includes a pretty detailed description of how I work in Photoshop, and what decisions I make.

So this is what I have to show for the Enemy 2 animation:
The ideas I had in mind was to have the enemy move similar to a spring. That was a tad too complicated to animate I quickly realized since you have to consider the foreshortening etc.

So I went with it just squashing itself, and then stretching to shoot the projectile. In my opinion it is an okay looking animation and it is serving its purpose.

I mentioned that the enemy was going to shoot a projectile, so instead of having to ask the programmers to do a bunch of work in the engine. Just so that I could see the result of the animation in work. I did myself a little mock up of how the two animations that I have made would blend together.

And it all look pretty coherent to me and we will see how we can recreate this in game. It is not impossible by any means but you never know what problems might appear.

A quick look at the bullet or projectile for Enemy 2:
For the bullet, we wanted something slimey and organic. All this with a toxic green, desaturated color palette that would fit the enemy 2 color scheme. As well as contrast between the players bullets, that are very saturated and neon colored.

What I did for the mock up animation was that I squashed the projectile for a single frame to give the viewer a sort of preparation before the actual projectile starts to move off screen.

I personally think that it gives the projectile a little bit more power in it's motion, even though it is just visible for two frames.

Thursday, March 12, 2015

Artifact: Enemy 2 Animation

Blog post 12/03/15

Another week another blog post! This week I’ve been working on the second enemy (enemy 2). Re-working it’s first design so that it fits the same art direction as enemy 1, and animating it’s idle animation.

The experience I've gathered from working on enemy 1 for so long has helped me create a completely new animation for enemy 2, much faster than before. The reason for that is because I've made myself a personal workflow to follow.

I have learned how to use key frame animation more efficiently and since our game doesn't have too complex animation at the moment, I can keep the frame count relatively low. So I actually don’t have to use Photoshop's video timeline.

The way I work is by opening up a new file and making a layer specifically made for drafting out the key frames. By writing out the amount of frames I want across the canvas, I can draw a really rough sketch of my keys under the number.

blog ani drafting.png

As you can see it’s really rough and it’s pretty much me experimenting with the timing, and figuring out the animation loop.

After I have my basic idea of what I need to animate I separate the key frames into single layers,
preparing the Photoshop document for animation. Drafting out the key frames like this is a quick and easy way to have a greater overview of your animation, and a better foundation to work from.

After I’m done and have the timing and loop set I add all the frames and animate the animation with a hard round brush. It will looks sketchy at first but the hard round brush makes things easier to clean up, and helps when I’ll fill in the flat colors later.

blogg line sketch.pngBlogg flats.png

The blue lines and the grey lines are all guidelines for the timing of the animation. The blue lines are a long wave shaped line that is there to dictate how the shape of enemy 2’s body will move along it. This method of animating was something I came up with when I was struggling with enemy 1’s “wings”.

The basic idea is that you have a long wave that will be the track for the asset you’re animating to follow. Move the blue guideline down on the next frame and continue until you have your full animation done. Something that helped was to put a line that showed where the end frame was so that I could fit the spacing perfectly for the animation loop to work.

When the animation was done it was time to polish it all up visually. Filling in the flats and then going over all the frames for shading and highlighting. Adding the eyes and making sure that all the frames matched up without any noticeable difference.

blogg Shaded.pngblogg 128.png

When that’s done I re-sized enemy 2 so it fit the game, going from 1024x1024 to 128x128.
It reads good and retained all the main features. I did however notice that the colors were too saturated compared to the game, so I increased the contrast and changed the Hue/saturation to fit the game more.

Finishing it up with sprite sheet packer and sending it off to the programmers to implement it in-game.

Enemy 2 idle spritesheet.pngEnemy-2-animatedV2.gif

Thursday, March 5, 2015

Animation artifact

Time for the 3rd post about animating in Photoshop. Yes it's probably very repetative to read all this, but imagine actually being the person working on it haha. Serioulsy though I was very burned out working on this last week but something refilled my energy and I've been doing some proper work again.

So what is the work I've been doing? I've actually not been animating, well a little bit but mostly correcting small errors in the animation. For example adding the teeth and merging the line art layer for clean up, where ever the "fleshy" part of the alien would clip through.

Other than that it's been work, moving the entire previous animation I did in Photoshop CC's video layer tool over to the key frame tool. This meant sitting down for a good while cutting and pasting each individual part, and frames of the alien over to a new document using the key frame animation instead.

The reason for this, has been explained in the previous post. It's basically video layers not working too well when you want to duplicate an animation and re-use it, only mirrored and editable.

When I was finished transferring the animation over to key frame animation, I started setting up the layers so the animation could actually play. This is a very time consuming process, since every layer will be representing each frame ( work flow with key frames explained in the first artifact post ).

After all the "hard" work was over I began filling in the flats for the alien, through out the frames.
I did feel like the colors I picked from the first iteration of the alien was a tad too saturated. So I'm experimenting with the hue/saturation in order to hit the sweet spot for the color scheme.


Sorry for the flashing, but I have only finished a few frames completely. Shading an animation takes a bit of time. Speaking of shading, it's another part of the animation I've learned a lot about. The work flow I used for the very first version was to hand paint everything at a high resolution.

Each frames was a "finished" frame. This was not optimal. Because every frame I finished had way more differences compared to the neighboring frame. you could compare it to working  zoomed in on a painting for too long and not seeing the whole picture.

What I've been doing differently this time around is that I'm rendering 2 frames completely and then use those 2 frames as a reference point. After that I'll shade in one shadow at a time, and then do a playback to see if that single shadow fits into the animation.

Thursday, February 26, 2015

Multiple Iterations of Enemy 1

This week I've revisited the animation for enemy 1, after receiving very helpful critique.

The main issue people had with my first animation was the fact that it was very static. People was expecting more dynamic movements from enemy 1. Something representing the enemy's "walk cycle", actually seeing the alien shell move along with the body and the big teeth opening and closing.

So what do you do when you have a finished animation and you need to apply so many changes to one character? My decision was to start over from scratch. The reason I made that decision is because if I have created something, can do it again but better using the experience from the previous attempt.

I have almost been able to fulfill all the things I wanted add to the animation. I have unfortunately crashed into a rather big problem. That problem can will be known as the video timeline in Photoshop CC.

It's been no problem animating with the video timeline and I understand it a lot better than I did when I first started out. The big issue with the video timeline is that when I try to transform a video layer PS wants to convert my video layer into a smart object, which causes the copied video layer to become un-editable.

Removing any ability for me to edit and draw on the specific frames that I need to draw on.

I'm not finished and I have to find a solution for mirroring an animation layer. After I find a solution for that issue, I can continue working on coloring the enemy.

One of the solutions would be to export all the individual frames over to Adobe Flash and continue working in Flash instead. However I'm not familiar with Flash, and learning all the tools might consume more time than I have.

The one solution I'm most certain that it will fix the issue with mirroring the video layer, is by saving the current animation I have at the moment, back into a key frame animation. This will be very time consuming and tedious, but it's a certain way to be able to mirror the frames i need to copy and continue on my work.

To summarize: I need to revert back from the video timeline workflow, to the key frame animation workflow.

*UPDATE 22:09*

After I uploaded the post, I had a talk with my fellow students and came to the realization that I've been working on a single key frame video layer instead of dividing them into separate key frames. So I've been basically adding my key frames in a single layer meant for the in-betweens.

I'm a bit annoyed that I've been missing such an important aspect of animating with video layers, but at least I managed to figure it out. Though mirroring a video layer for editing is still a mystery so far.

Friday, February 20, 2015

Artifact Post #2

The "Power Ups"

For week 2 I chose to write about the items in our game and what design decisions I've made.

I've been finishing up the sprites for the items, that the player will be able to pick up in game. Cleaning up the sketches and altering the colors, as well as the refining the shapes.

The game currently requires 4 items:

Health Pack
Overcharge
Battery Pack
Time Warp


Time Warp is one of the two power ups in the game. A power up item will change the gameplay in some way when picked up by the player. Time warp will slow down everything on the level except for the player character. 

The original design for this power up was a white hour glass, inside a sphere with neon rings around it. This was a very early design of it and unnecessary details was probably not a high priority. The team who made the concept focused on having a clear representation of what the item did.

I wanted to stray away from those decisions a bit. The main focus would of course to have the items to be easy to recognize, but I wanted to add a little more detail. So what I did was to draw/paint and actual stop watch. Getting rid of the silhouette of what the item is and instead actually make a sprite of the actual object. In this case a stop watch.

Overcharge is the second power up in the game. Overcharge works in a different way, since it's mechanic is to have the player gun shoot much faster, that makes it easier to kill the enemies.

This design was one of the most difficult ones I made. I started out sketching a bunch of different ideas in my sketchbook, trying to think of how an overcharge ability would be represented as a visual object. 

I couldn't actually decide on it so I created a sprite that had all the features from the original design, as seen on the previous groups one-page design. I actually don't mind the simplistic looking power up design.

The reason is that it differentiates itself from the other items. Which is also why I slightly warped the neon rings around he power up, giving it a different silhouette, so to not confuse it with Time Warp.

The Battery Pack is not a power up, but is instead used to replenish the players suit power. These battery pack will be scattered through out the levels for the player to find and use.

The battery pack was easy enough to design. Use the base idea that it's an actual object in the level for the player to pick up and use. For example, a battery is something that could be physically picked up and put inside a battery holder. Unlike an overcharge ability.

The Health Pack will have the same properties as the battery pack. However the health pack will replenish the players health bar, which is separate from the battery energy.

The health pack wasn't a hard task but it was an interesting one. That's because I had a lot of design options for it. A roll of bandage, small health box, generic red orb etc. so I thought of the idea of combining a syringe with an USB.

Something small enough to fit in a persons hand, then plug that into your arm, deplete it and you can heal wounds faster etc.


Sprite Sheet


Thursday, February 12, 2015

Artifact post #1

Creating an animation for "Enemy 1"

The artifact I've been working on during this past week has been the animation for "Enemy 1".


The animation I've made is going to be used for our the first enemy out of two in our game project.
It will represent our enemy moving around the level and towards the player.
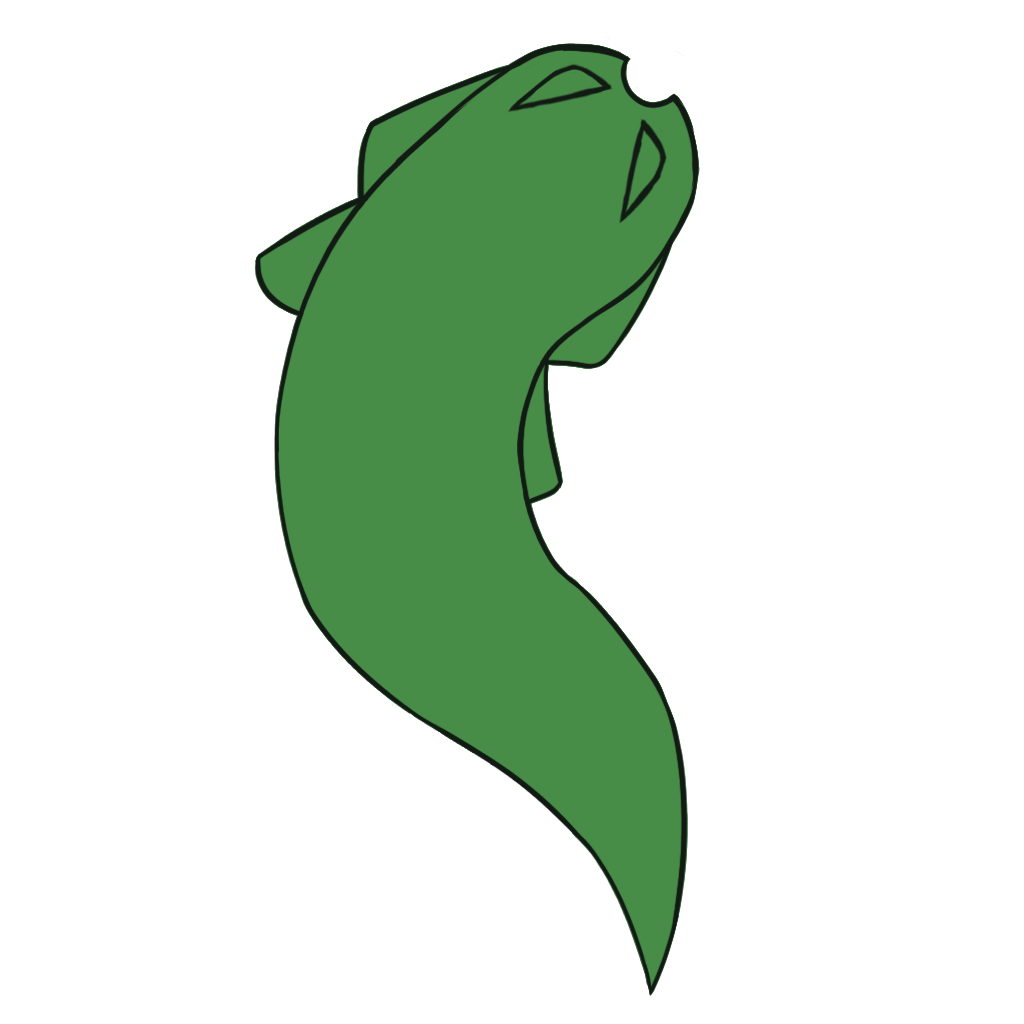
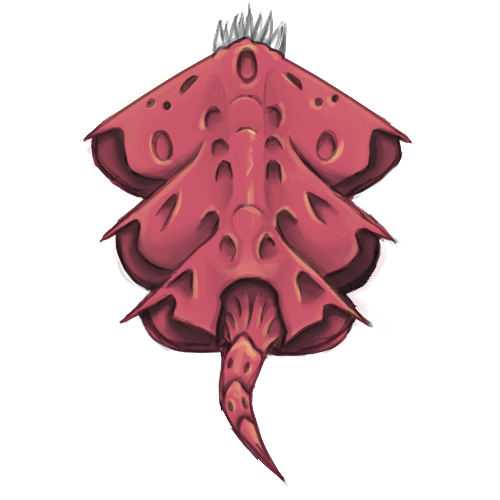
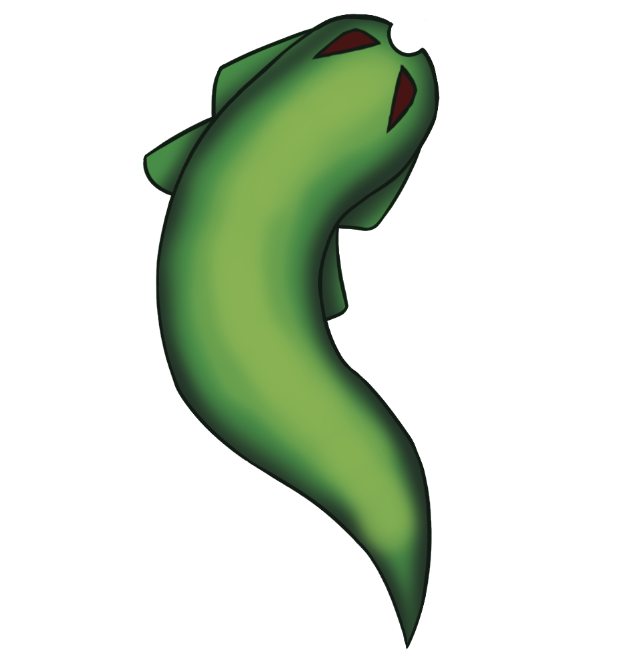
Enemy 1 version 1

The animation takes it's inspiration from snakes, moving their tail back and forth, as well as an eel in water, since our game is set out in space with zero gravity.

My foundation for animating the enemy originates from the first sprite I made. That sprite had to be a representation of what the enemy would look like in-engine. So any movement wasn't necessary at the time.

After the test in-engine was successful I started working on animating the enemy. I used Photoshop CS6 during the entire process since it's the software I'm most familiar with.

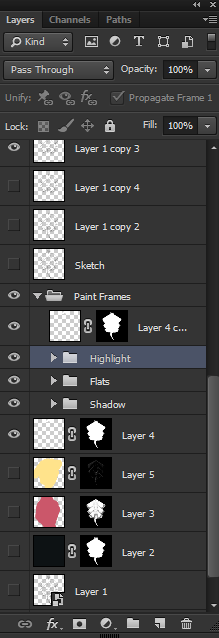
4 base layers, respective folders contains
required layer copies for the frames
(10 layers in each folder)
I had never used the software for animation before, so it was a big learning curve figuring out the various tools available.

The way I used Photoshop to animate was by creating"Frame Animation". The reason I used frame animation and not a video timeline was because of the multiple layers I had already created for the base sprite.
I have yet to figure out how to animate using layer masks with the video timeline option.

I approached the frame animation by creating a new layer for each frame in the animation. Painting every shadow, diffuse and highlight color by hand.

This approach was very time consuming but I had a lot of control over every single frame. I could edit every single detail if needed, the downside was navigating all the layers.


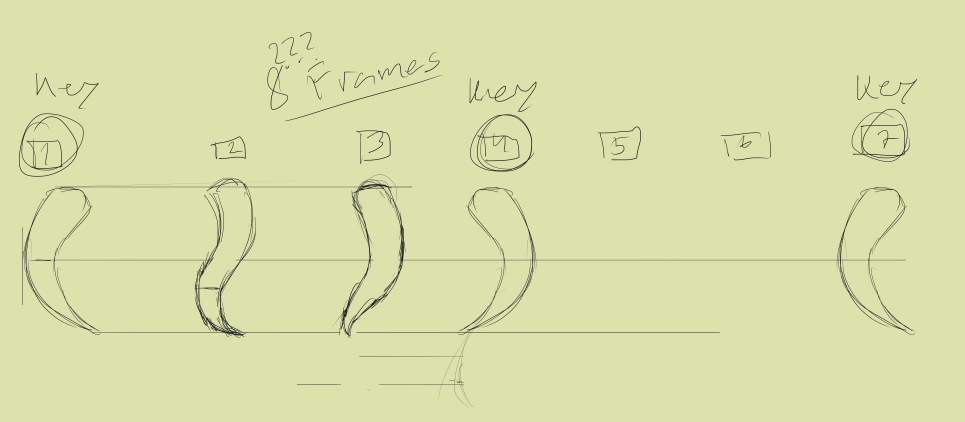
The Frame Animation Timeline
After I had grasped the animation tool a bit better, I started to create various loose ideas for how the movement was going to be animated.

This was almost 40% of the work I put into the actual artifact, since it was one big hurdle to overcome. The lack of knowledge with animation was a big set back.

So I had to reference a lot of videos of what to think of when animating. It was a struggle but the end result is decent in my opinion.

I am going to create an iteration on the current animation based off our teachers critique today, animating the entire body moving in synchronization with the tail.

This will give a more believable look to the enemy, and since I have a good grasp on animating in Photoshop now the result will be easier to produce.
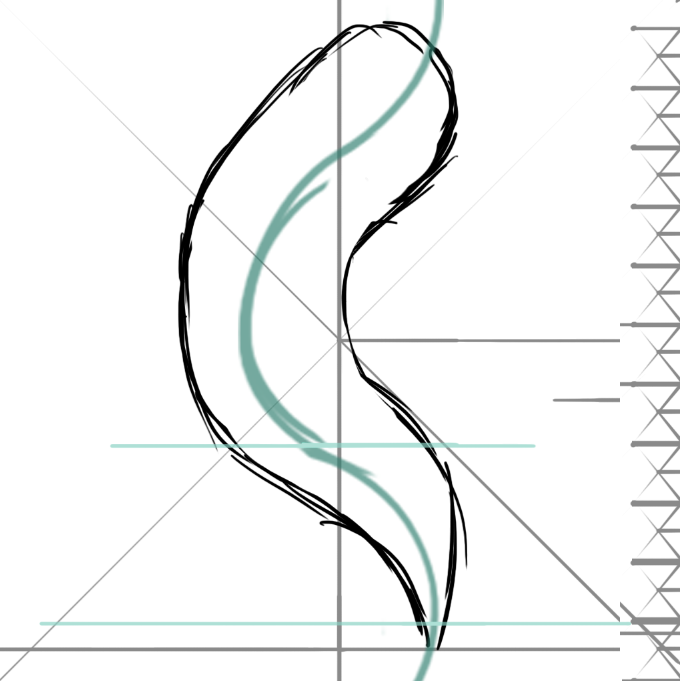
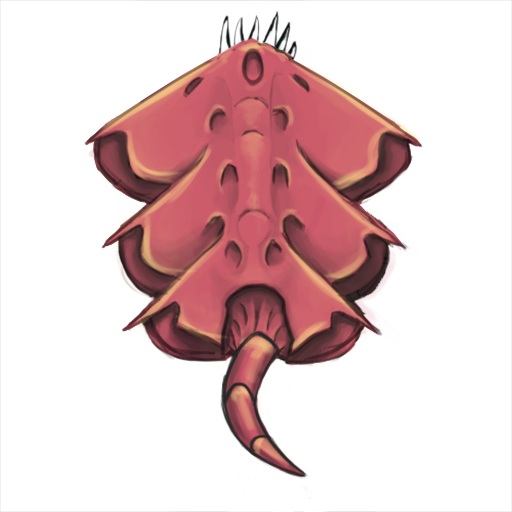
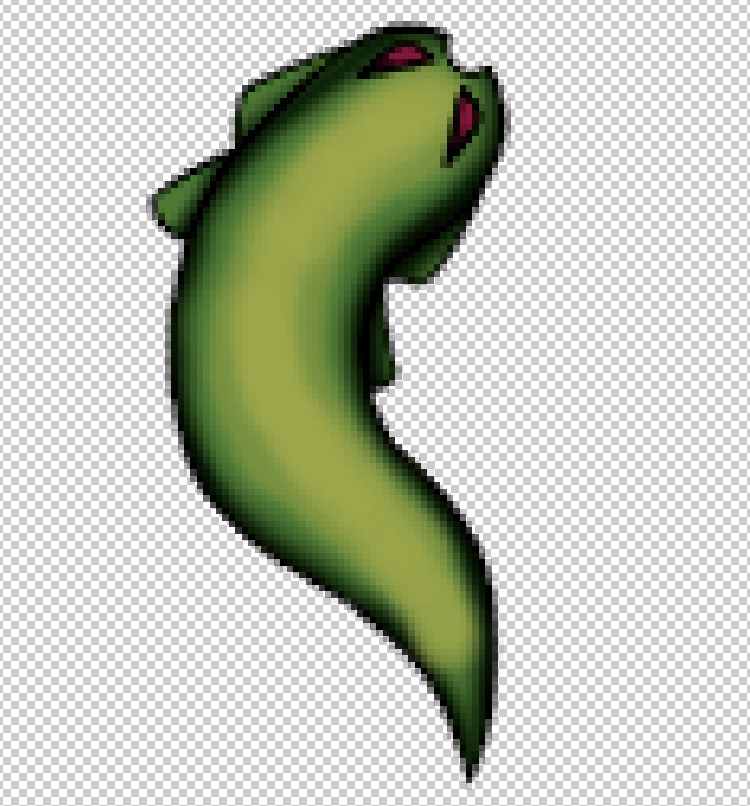
Simplified Version (Enemy 1) 
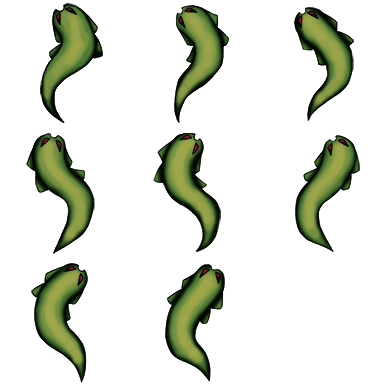
Enemy 1 Animation

Friday, January 23, 2015

Scrum Backlog, Project S

Today has been the first meeting with our Scrum master for group 8 regarding our new project, The Last Signal. We had a talk about what our plan is for the coming weeks trying to organize the project to our best abilities.

We finished writing our Scrum backlog this evening and here is a piece of it.