Blog post 12/03/15
Another week another blog post! This week I’ve been working on the second enemy (enemy 2). Re-working it’s first design so that it fits the same art direction as enemy 1, and animating it’s idle animation.
The experience I've gathered from working on enemy 1 for so long has helped me create a completely new animation for enemy 2, much faster than before. The reason for that is because I've made myself a personal workflow to follow.
I have learned how to use key frame animation more efficiently and since our game doesn't have too complex animation at the moment, I can keep the frame count relatively low. So I actually don’t have to use Photoshop's video timeline.
The way I work is by opening up a new file and making a layer specifically made for drafting out the key frames. By writing out the amount of frames I want across the canvas, I can draw a really rough sketch of my keys under the number.
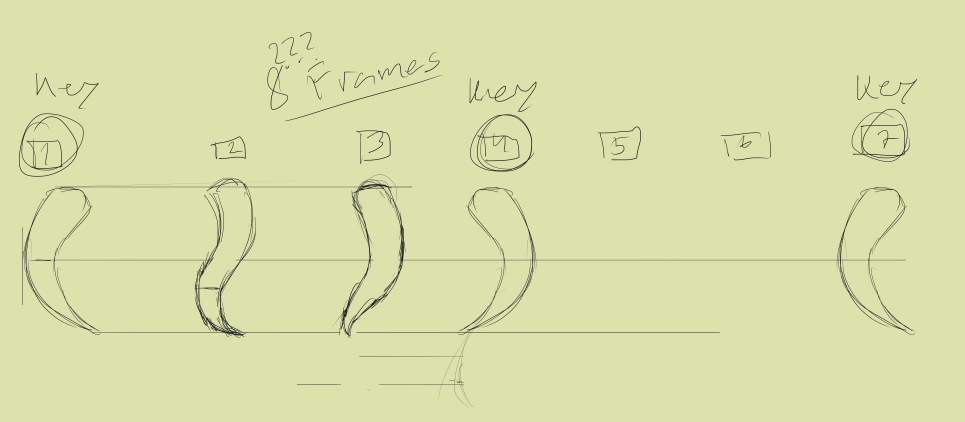
As you can see it’s really rough and it’s pretty much me experimenting with the timing, and figuring out the animation loop.
After I have my basic idea of what I need to animate I separate the key frames into single layers,
preparing the Photoshop document for animation. Drafting out the key frames like this is a quick and easy way to have a greater overview of your animation, and a better foundation to work from.
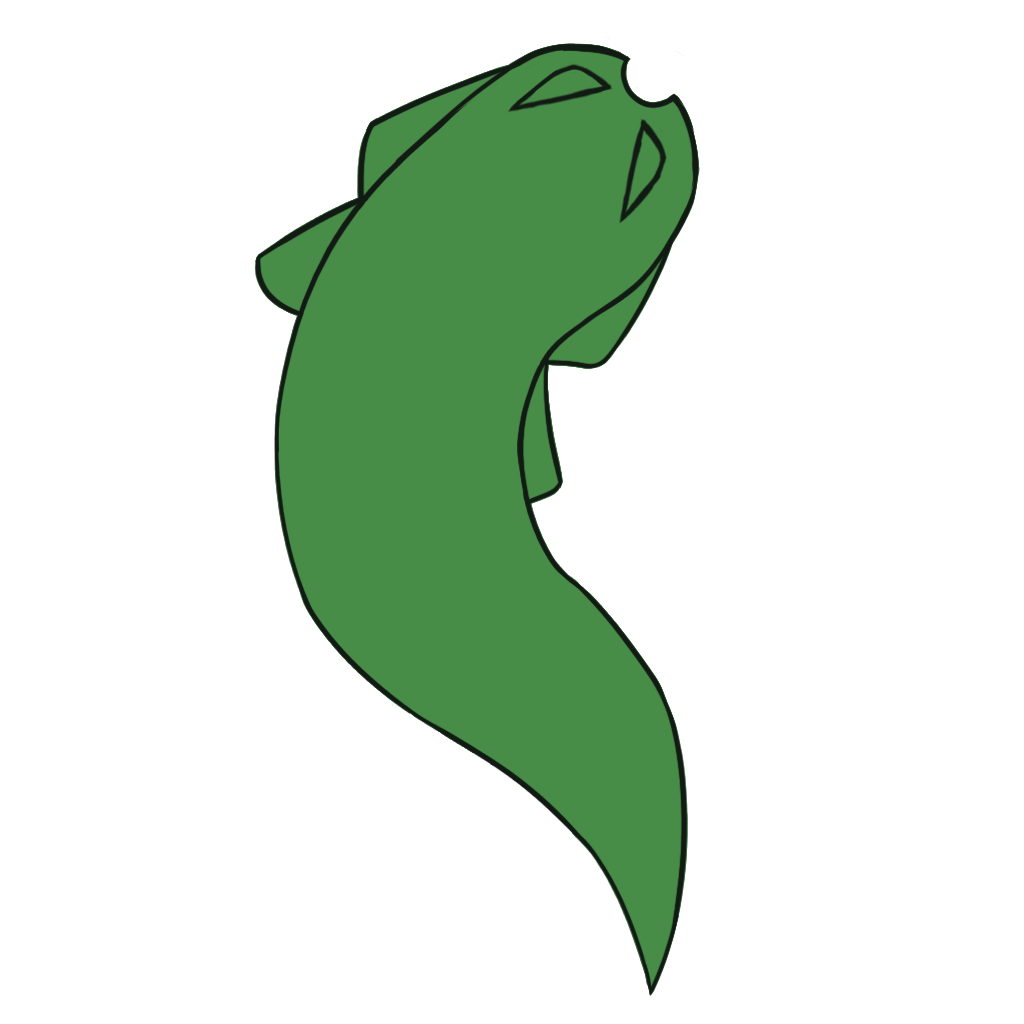
After I’m done and have the timing and loop set I add all the frames and animate the animation with a hard round brush. It will looks sketchy at first but the hard round brush makes things easier to clean up, and helps when I’ll fill in the flat colors later.
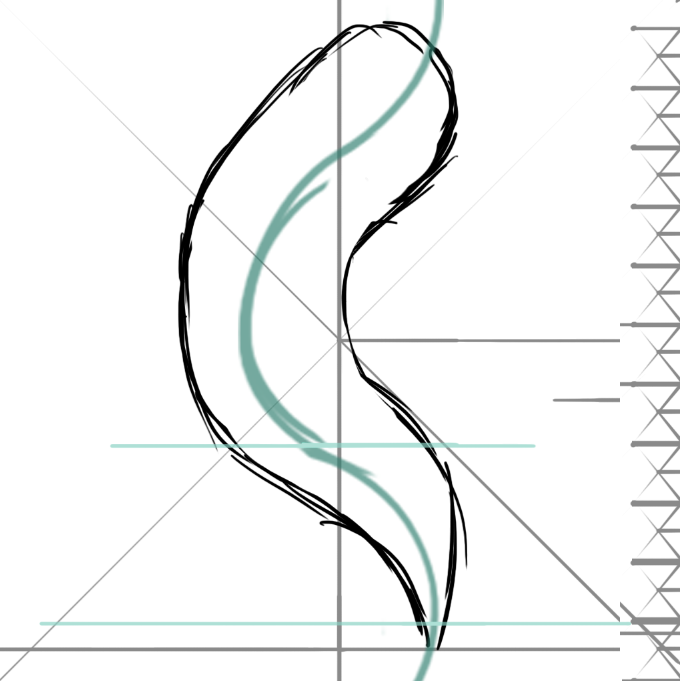
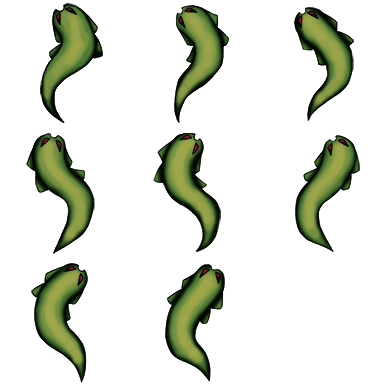
The blue lines and the grey lines are all guidelines for the timing of the animation. The blue lines are a long wave shaped line that is there to dictate how the shape of enemy 2’s body will move along it. This method of animating was something I came up with when I was struggling with enemy 1’s “wings”.
The basic idea is that you have a long wave that will be the track for the asset you’re animating to follow. Move the blue guideline down on the next frame and continue until you have your full animation done. Something that helped was to put a line that showed where the end frame was so that I could fit the spacing perfectly for the animation loop to work.
When the animation was done it was time to polish it all up visually. Filling in the flats and then going over all the frames for shading and highlighting. Adding the eyes and making sure that all the frames matched up without any noticeable difference.

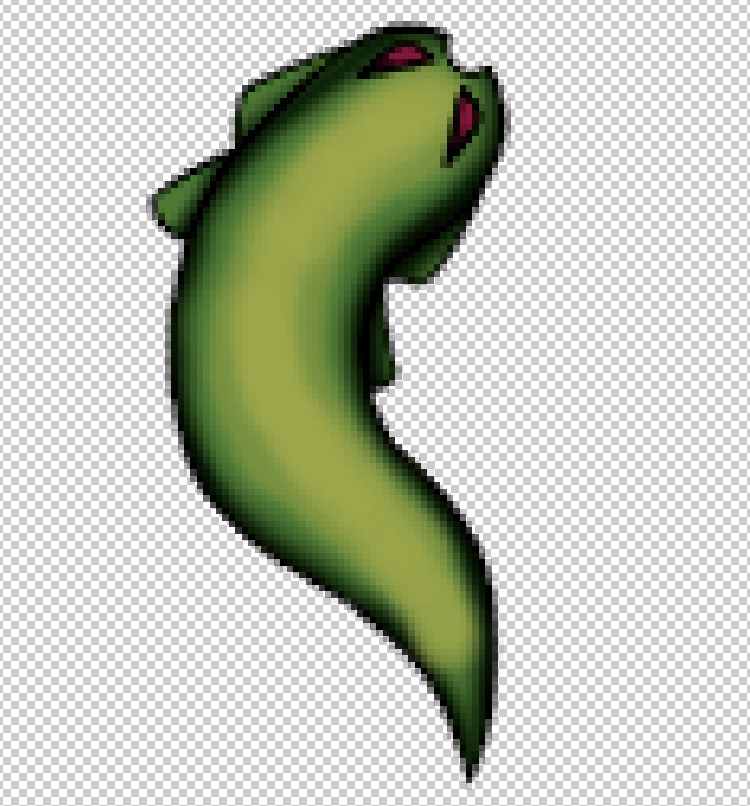
When that’s done I re-sized enemy 2 so it fit the game, going from 1024x1024 to 128x128.
It reads good and retained all the main features. I did however notice that the colors were too saturated compared to the game, so I increased the contrast and changed the Hue/saturation to fit the game more.
Finishing it up with sprite sheet packer and sending it off to the programmers to implement it in-game.

10/10.
ReplyDeleteReally nice animation! I find it impressive how smooth the wave motion came out and how well rendered each frame is. I find it very difficult myself to get gradients to look good when animating something.
ReplyDeleteThe post itself is well written. You stick to the subject and explain your process very thoroughly. I can clearly follow each step you have taken when creating the animation and I appreciate that you show your first drafts and how you have kept the motion throughout with the blue line. The post is very helpful for someone wanting to create an animation because you describe the methods you have used and give valuable tips without using too many technical terms. You mention why you are doing what you are doing technically, but I would have liked to read a little more about how you thought when creating the design of the monster, like why it looks like it does and how it fits into the game.
To summarize I found your post very valuable, with a good walkthrough of your process. I am not very experienced in animation and some of the methods used here are new to me and seem very handy when doing these types of animations.
Good work!